| Scott's Atlas / Craftsman 101.07403 12x36" Lathe, modifications and projects. Stone Mountain, GA | Unique Visitors: |
 |
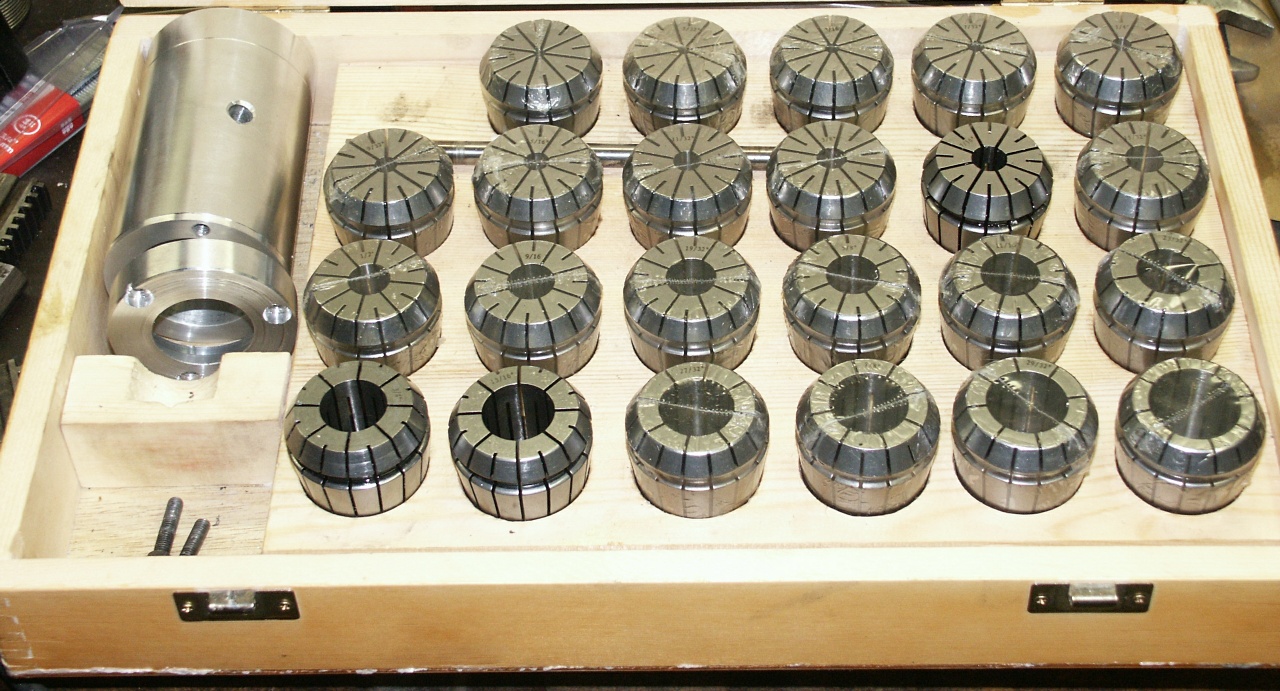
My Collet set came with an MT3 to ER40 collet chuck. It seems to work well, but you cant extend the work through the chuck. That compounded with the slight inaccuracies of the spindle, I decided to make my own. Since the chuck will be made on my lathe, it should take care of any innacuracies. |
 |
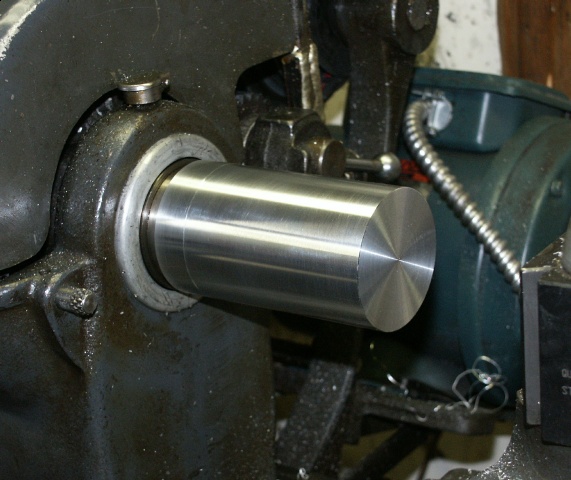
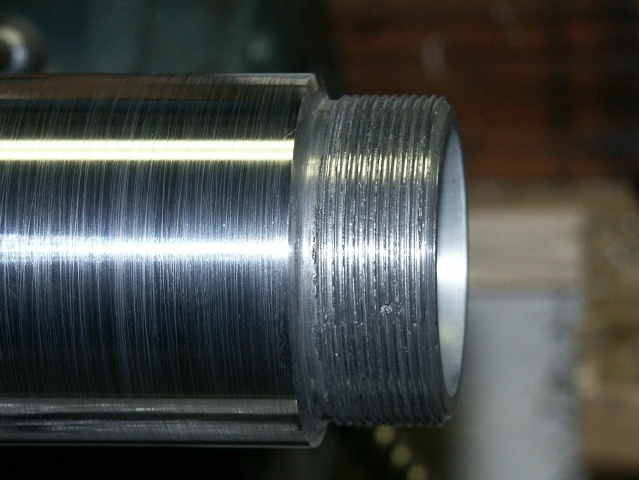
Here is the first step of making an chuck to hold ER-40 Collets. I used a 2.25" 6063 aluminum bar. I mounted it in a 6" 4-jaw chuck and centered it within 0.001". It does not have to be exact center as it will be turned later using the threads as the center. I first faced the end of the bar. this will mate up with the shoulder of the spindle. Then bored to 1.347 about 1 3/4" deep. Then cut a 1.495" shoulder and the same size at the end of the threads as a stopping area. Finally, threaded 1-1/2", 8 TPI to fit the spindle threads. I forgot to take pictures of the threading process. The threading bar chattered bad doing the cuts. I did the last passes at 0.001" and repeated the last pass unchanged. Still some ridges on the threads thorough. Spindle speed was very slow, probably less than 100 RPM. For the final fit, I left the bar in the 4-jaw chuck and removed the chuck and tried the bar. First try was a bit too tight. Another pass cutting the thread and it went all the way on and was snug. |
 |
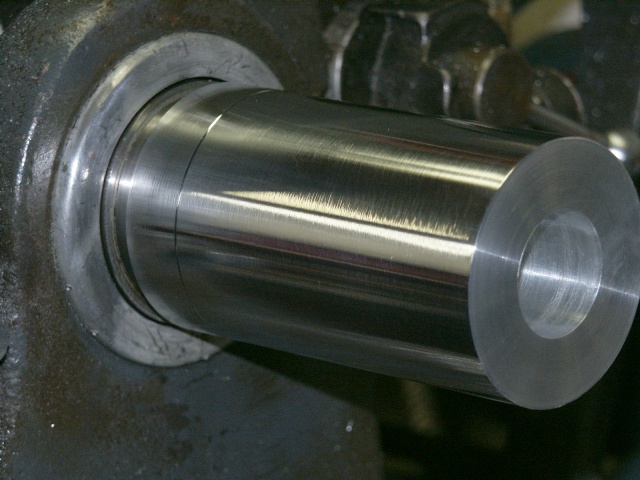
Then it was mounted on the spindle then turned just to true it up. Next will be boring it to 25/64 so a 3/4" bar can pass through the spindle. Then bore the taper to match the ER40 taper. I'm not sure how to hold the collets. I could turn and thread a cap to hold them. I have found doing inside threads difficult (all my inside thread tools chatter.) What I will probably do is turn a disc and use 3 cap screws to clamp the collet in. Note: this could also be a milling adapter by just boring a 1/2" hole and adding a set screw. Smaller mill bits could be used by turning sleeves. Would be accurate as it is turned and bored on the spindle it is used on. |
 |
Decided to center bore it just over 1" as the ER40 collets go up to 1". Will allow a bit longer stock to fit. Came out nice after a bit of car polish to keep it from corroding There is a hole in the middle between the ends for a "tommy bar" to make it easier to get off the spindle. |
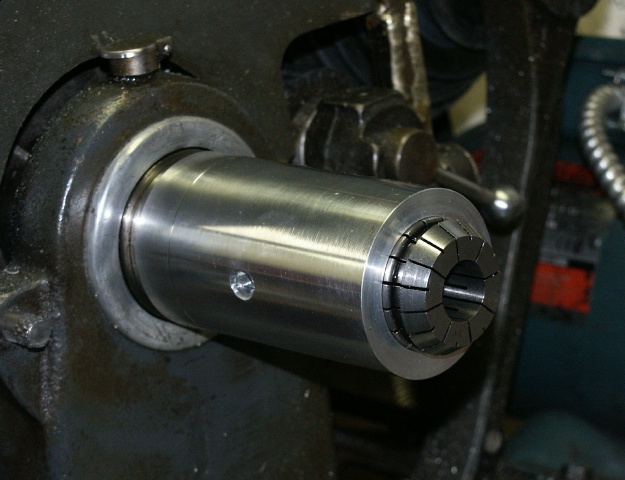 |
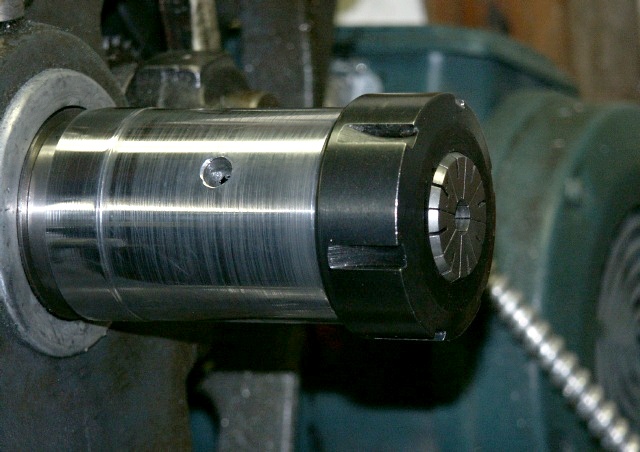
8 degree taper turned and 3/4" ER40 collet fitted. On the compound slide, the gauge showed almost 9 degrees. I have seen this before. In this picture, you can see the hole for the tommy bar to remove the chuck. |
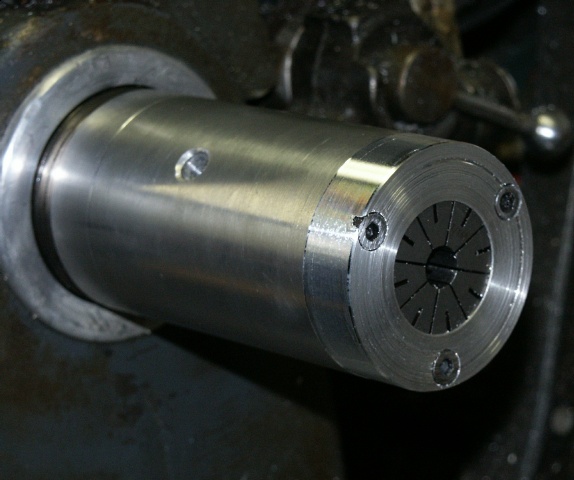 |
I made a end cap that used 3 screws. Worked ok, but the collet could be a bit off center if the screws were not tightened evenly. Decided to use a proper ER-40 nut. Making one is difficult as it has internal ridges and taper. |
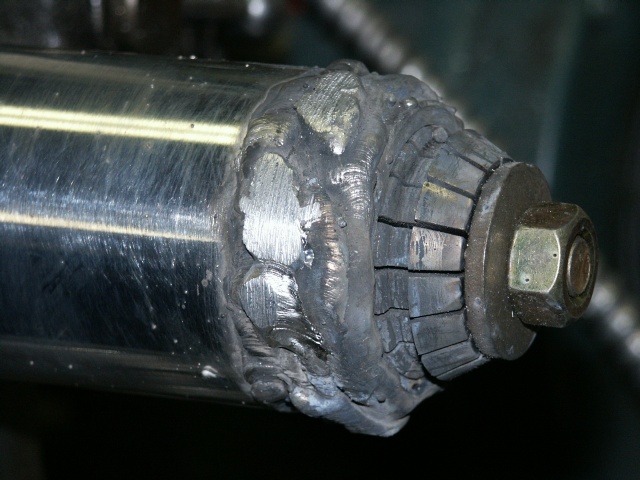 |
I finally got an ER-40 locking ring. I turned the end down to 50mm, then set up to turn a 1.5mm thread. I checked the gear setup several times before cutting the threads. Turns out the gear table for the metric threads is wrong and I screwed up the piece. So, grabbed MIG welder and some 5356 aluminum wire. I used the lathe as a positioner. Set it to turn at about 10 RPM. That worked out well enough. The big globs you see are I touched up some areas that the welds did not overlap well. As a MIG has a cold start, I started in a good area then moved to the low spots. So, the start points are real tall. Note: not shown is a brass plug that fit the far end of the spindle. This had a sliding contact for the welder return lead. That kept any currents from going thorugh the bearings. This is just starting to turn town to 50mm AGAIN! |
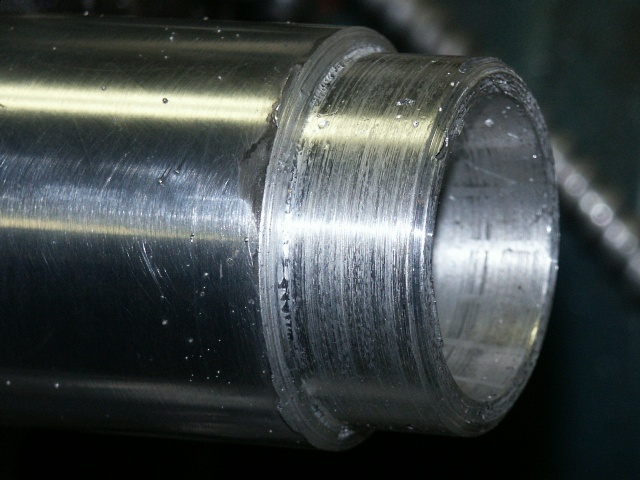 |
Turned down to 50mm. The 5356 is a bit grainy. There are a few pinholes but not enough to cause problems. Should have protected the rest of the adapter, will have to clean up the spatter. |
 |
Found another thread table. The "bad" one cut 1.5 threads per mm instead of 1 thread every 1.5mm. This new table ended up at 1 thread per 3mm. It was easy to switch from the 32 to the 16-tooth compound gear to change it to the right pitch. Threads cut. They came out ok, will need to be polished up a bit. |
 |
Finally! The adapter is done and works great. Will spend some more time polishing it someday. |